Overview
The Dovetail Gadgets are a powerful addition to the V-Carve Pro and Aspire software. The gadgets create the angular dovetail joints from the top of the material down rather than the traditional method from the side and using a special tool, this top down approach allows you to use a regular end mill to create the desired joint.
How It Works
There are two steps involved in how it works, the first stage is vector creation for the dovetails, this can either be done by yourself and use the Dovetail Detect Gadget to find valid Dovetails from your vectors, or you can create your design and add in the Dovetail vectors with the Dovetail Pin Creator Gadget. Stage two takes the results from stage one and creates the special toolpath required to machine the Dovetails. The video below demonstrates the toolpath in action on a CNC.
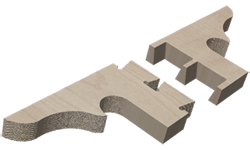
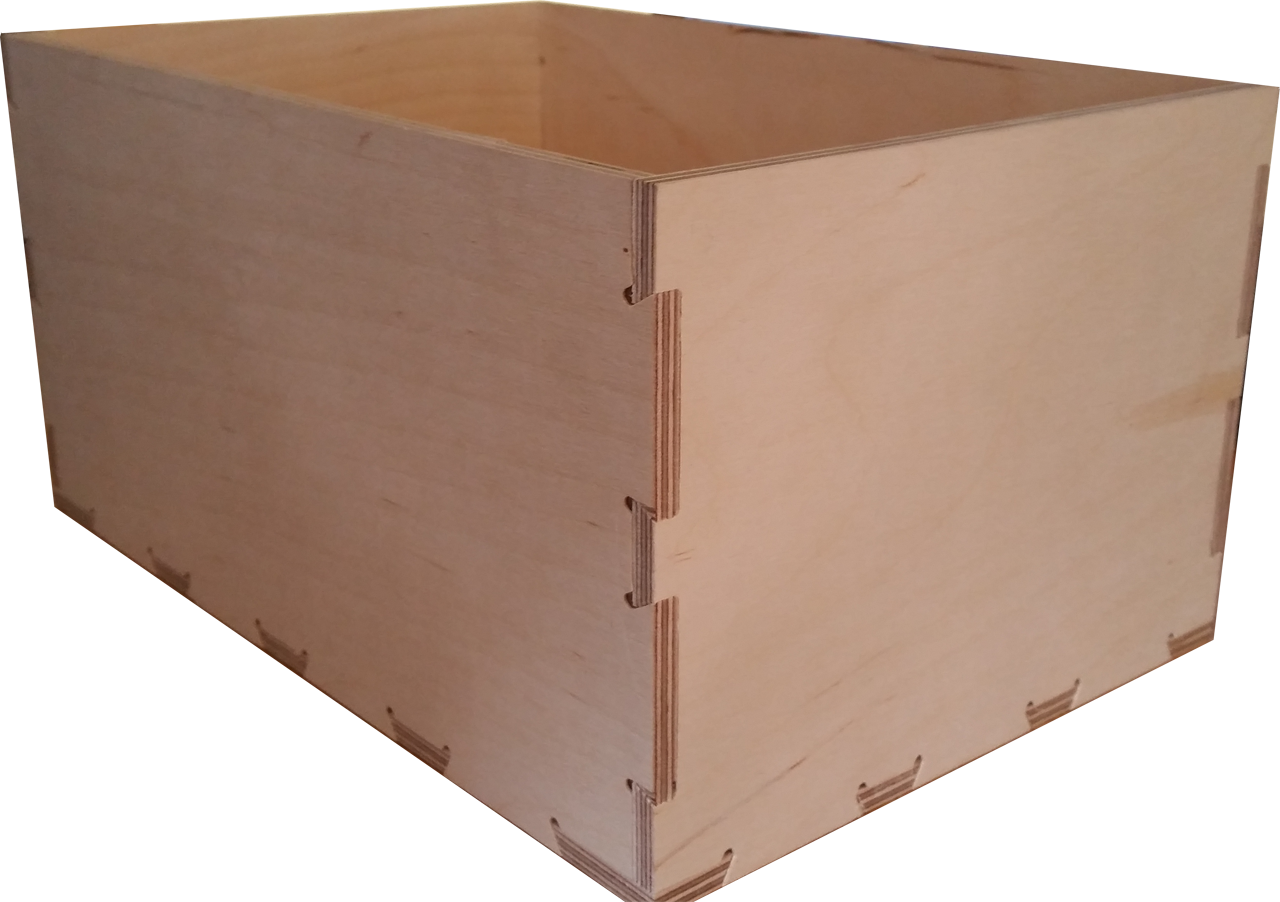
The images below are of the box which can be reproduced in the tutorial which follows using the Dovetail gadgets.

Tutorial
How to use Dovetail Detect?
This gadget should be used if you have created the Dovetail vectors yourself.
- Create your vectors with the Dovetails drawn.
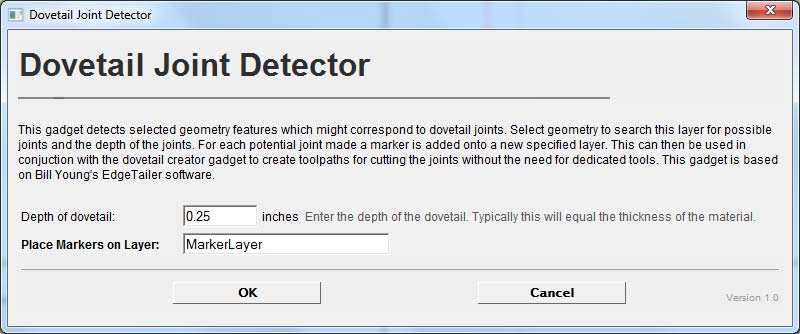
- Go to "Gadgets" on the toolbar and select the "Dovetail Detect" Gadget
- With the Gadget running you will have the following options
- Depth Of Dovetail: Enter the depth of the dovetail you have created
- Place Markers On Layer: Specify the name of the layer for the gadget to create with the markers present.
- Click "OK" to use the specified settings.
Notes:
- The gadget will now run and create a new layer with markers where the gadget detected possible dovetail joints.
- Delete any markers if necessary where you do not need Dovetails created.
How to use Dovetail Pin Creator?

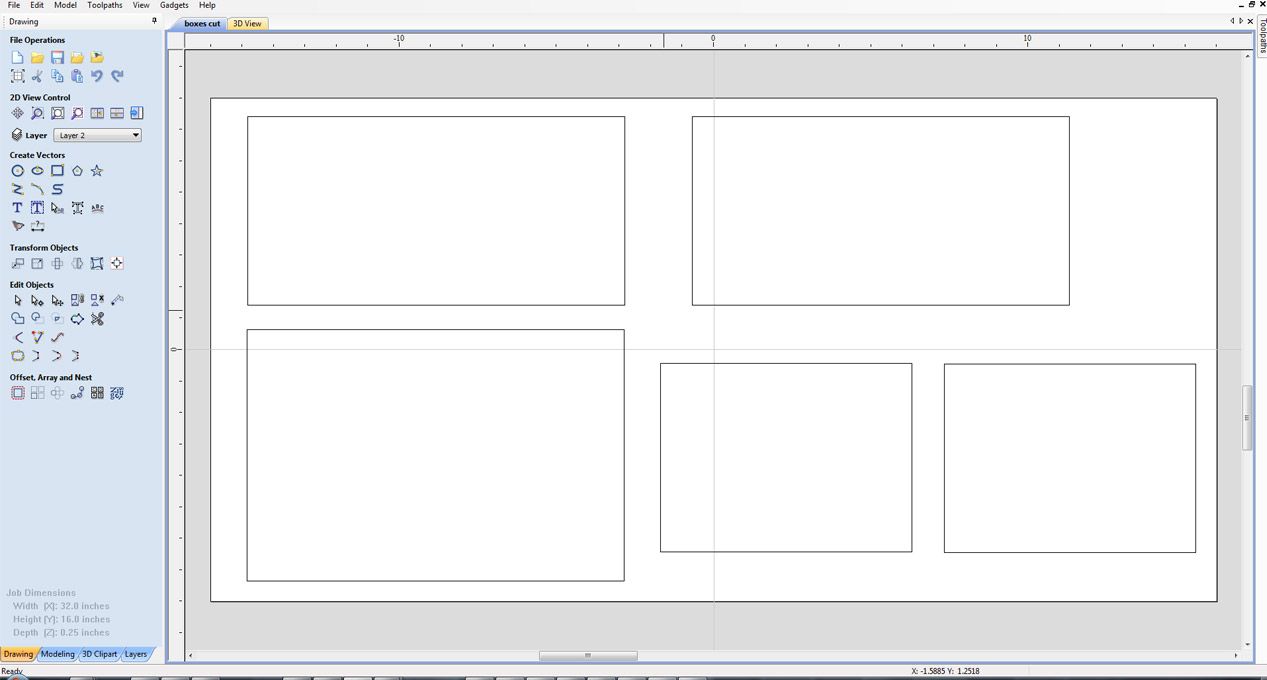
Create your vectors of what you would like to add Dovetail vectors to.
- The Dovetail Pin Creator requires you to select Single straight lines to add Pins or Tails to.
- If your design consists of closed vectors and no single line spans you will need to use the Node Editing tool and cut the single line span from the vector you would like to edit. If you are unfamiliar with this process please watch the short tutorial video on how to use this gadget.
- Select all single lines that you would like to add an equal amount of pins or tails to using the SHIFT key on the keyboard and clciking them with your mouse
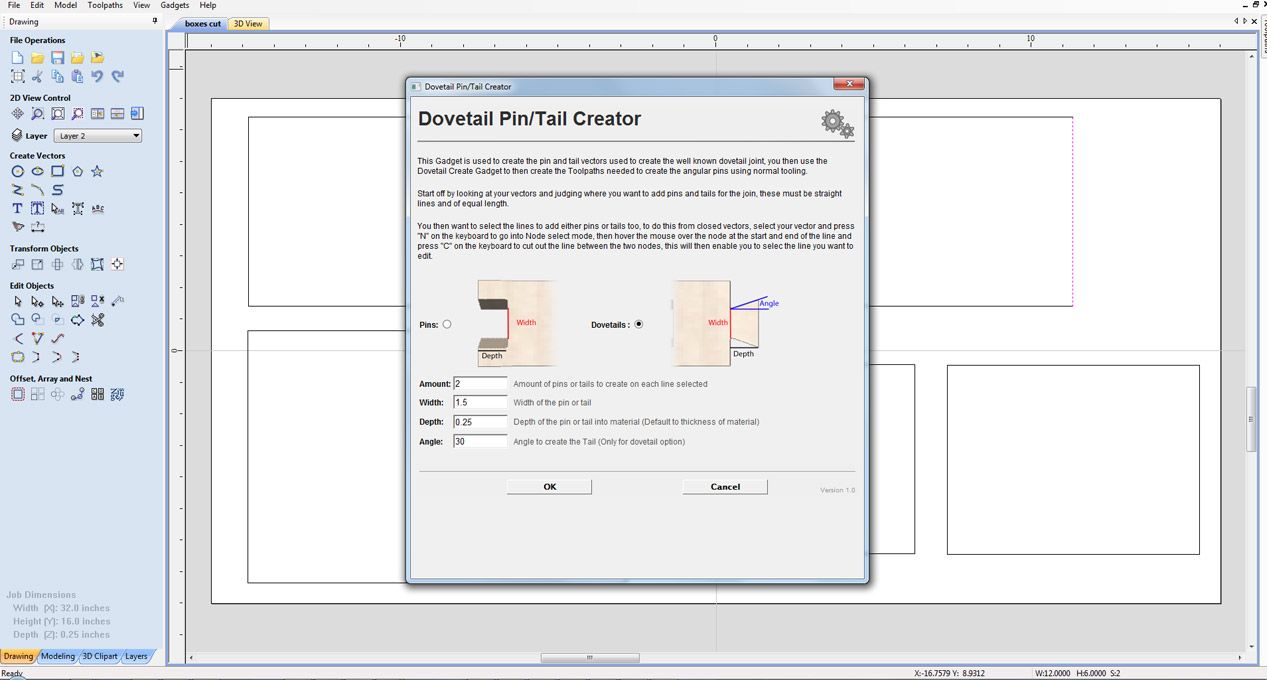
- Go to "Gadgets" on the toolbar and select the "Dovetail Pin Creator" Gadget
- With the Gadget running you will have the following options
- Choose whether you want to add Pins or Tails to the lines selected
- Amount - Select the amount of the Pins or Tails you would like to add
- Width - How wide along the length of the lines selected would you like to specify the pins or tails to be.
- Depth - How much of the material to cut into - this defaults to the thickness of the material
- Angle - Angle to create the tails
- Once all options have been set click ok to run the selected options and all lines selected will have the settings applied.
Notes:
- Only straight lines can be used in the gadget
- You can re-edit a line which has been the result of using the gadget previously, so if you need to change a line from Pins to Tails, you can do so.
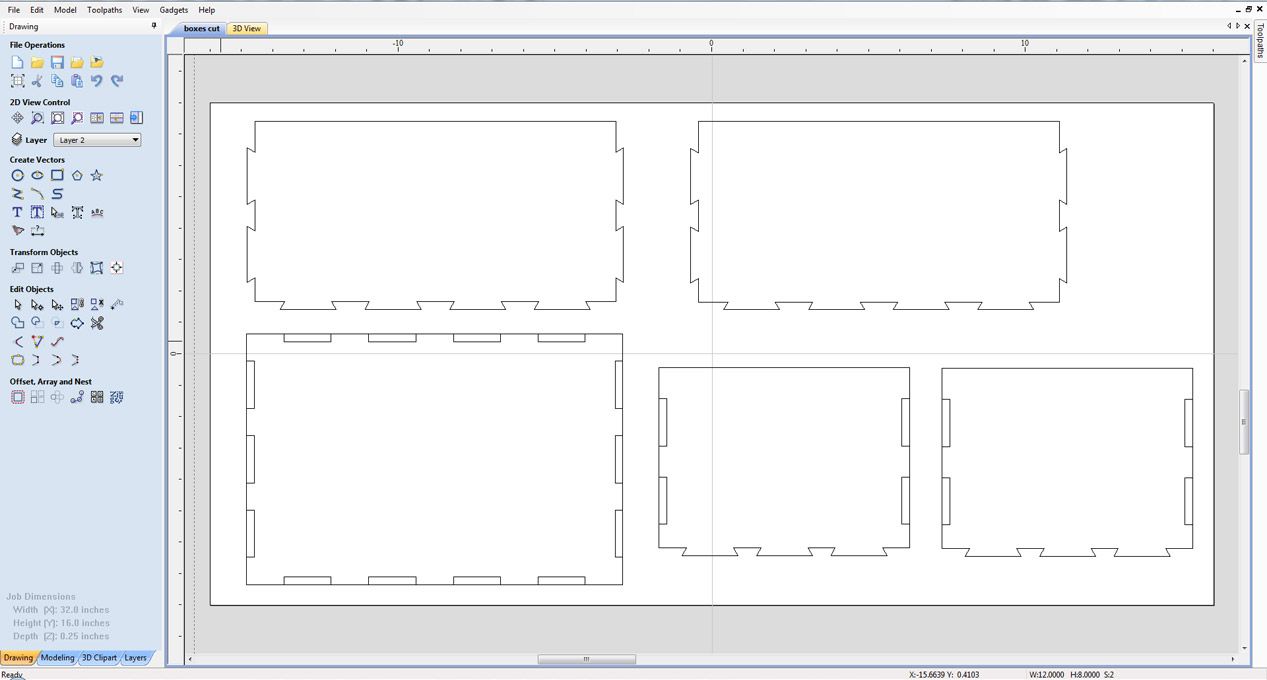
- The Tails will offset inwards so that they do not add on to the dimensions of what you have created. This does mean you will have to use the Trim vectors tool to snip away excess vectors. If you are unsure about this please view the short tutorial.
- A New layer will be added to your work called markers layer, this is for the final toolpath gadget to use and contains all the essential information to create the special toolpath.
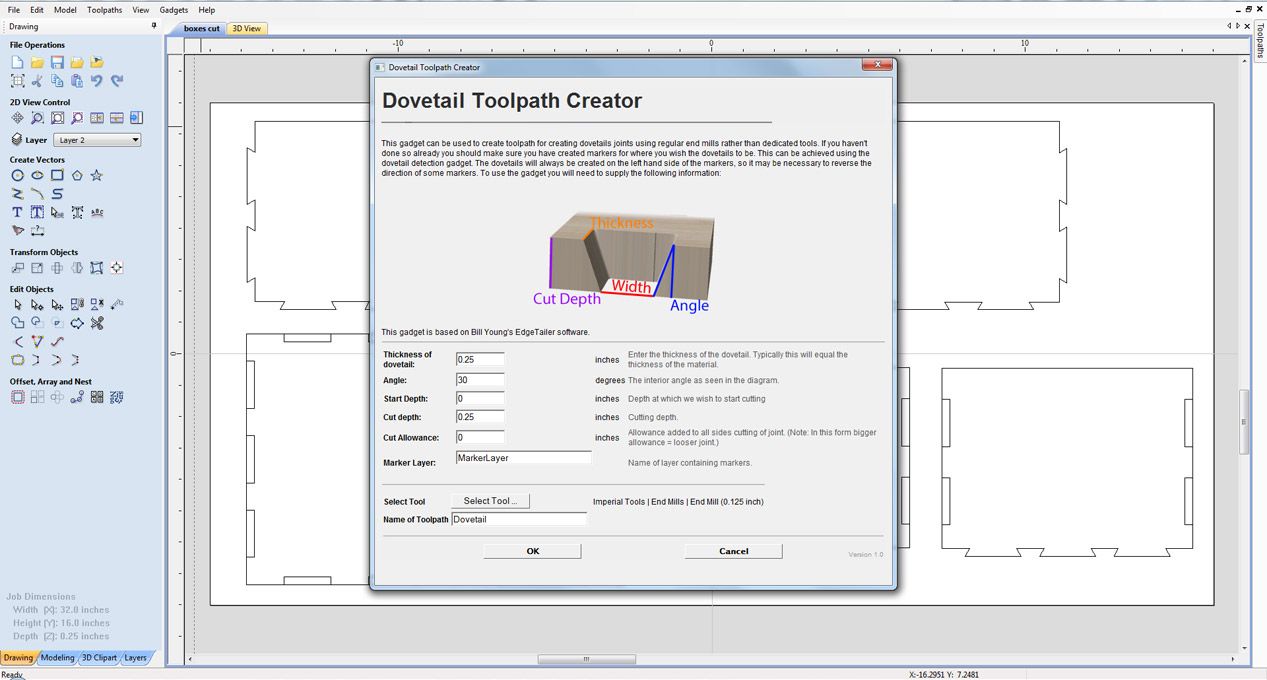
How to use Dovetail Toolpath Creator?
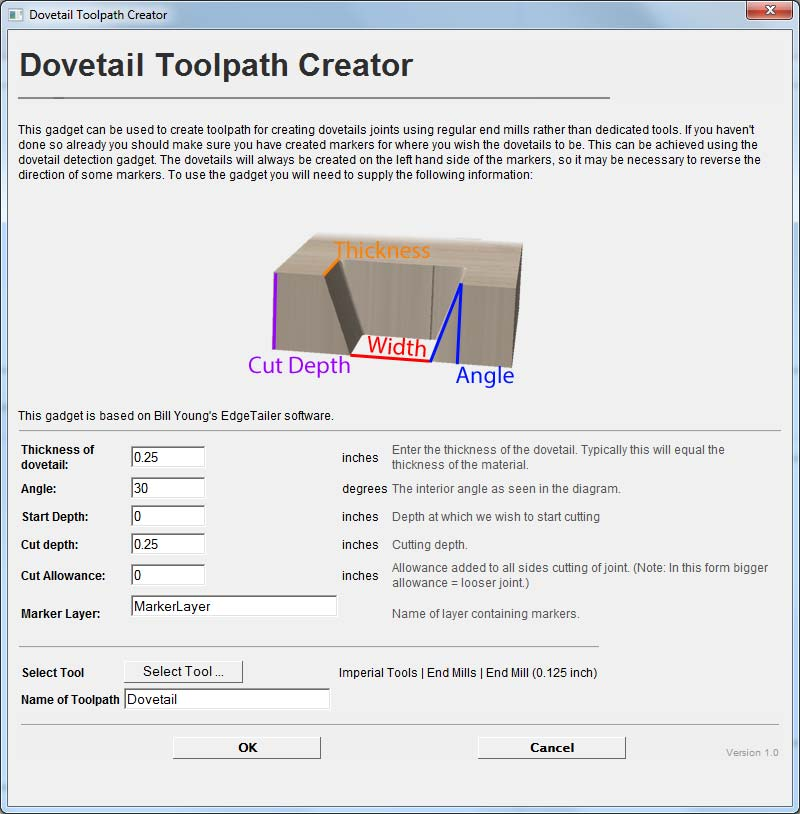
Go to "Gadgets" on the toolbar and select the "Dovetail Create" Gadget
- With the Gadget running you will have the following options - If you have used the Dovetail Pin Creator these settings will automatically be set
- Depth Of Dovetail: Enter the depth of the dovetail.
- Angle: This is the angle you need the Dovetail socket to be cut at to fit snug.
- Start Cut Depth:Specify how deep into the material to start cutting.
- Cut Depth: how far into the material you would like to cut from the start point
- Cutting Allowance: Allowance added to all sides cutting of joint. (Note: In this form bigger allowance = looser joint.)
- Marker Layer: Specify the name of the marker layer.
- Select Tool: Specify the Tool you wish to use for the toolpath.
- Name Of Toolpath: Specify the name of the toolpath for the gadget to create.
- Click "OK" and the gadget will run and create the toolpath required.
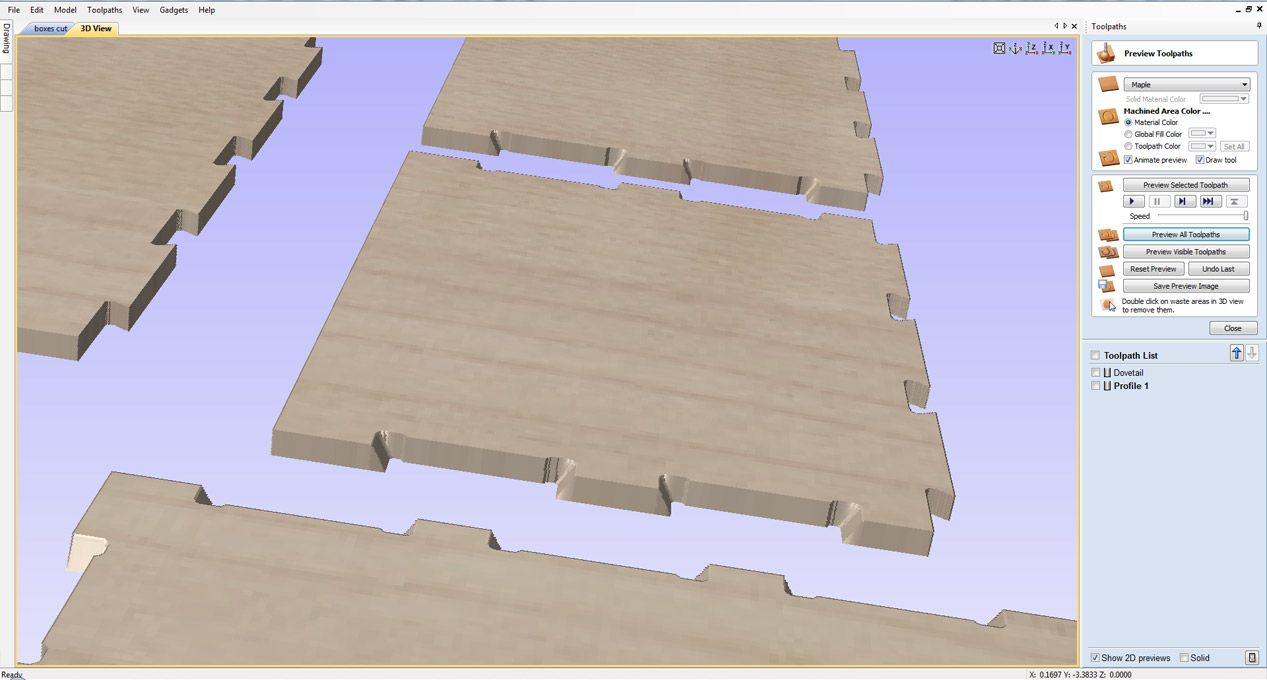
- You can now go to the toolpaths tab and "Preview Toolpath" to view the Dovetail Joint that will be created.
On a final note, when you come to creating the Profile Cut-Out Toolpath for your items you will need to rejoin your vectors using the Join Vectors tool, if you are unsure about this please watch the short tutorial.
This gadget is based on Bill Young's EdgeTailer software